Posted in Knitting, Stampin' Up

Christmas Card Season Is Here!

This year I’m making about 100 Christmas cards. Good thing I’m not hampered by a pesky job . . . Mimi calls this time of year Christmas card season, and she’s not far off.

I love paper crafting, and I can spend hours creating tiny pieces of art in the form of cards. My crafting space is what spawned my blog title, The Craftermath. Check it out:

craft-desk

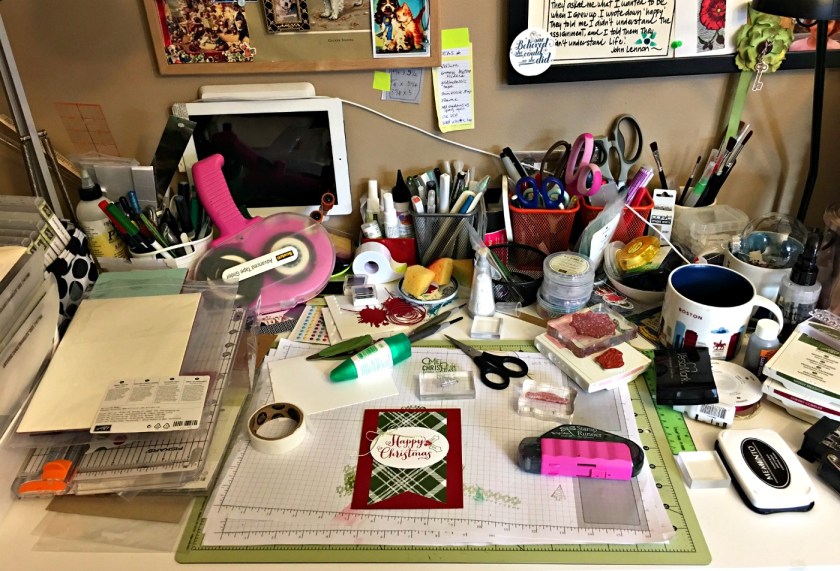
It’s the aftermath of crafting!

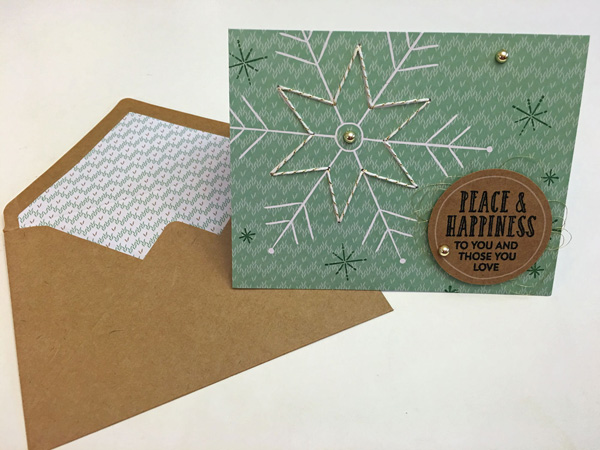
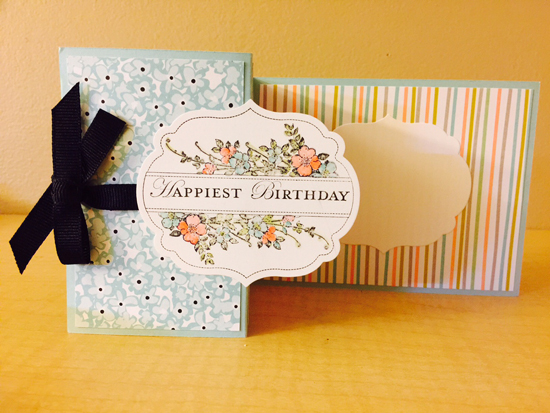
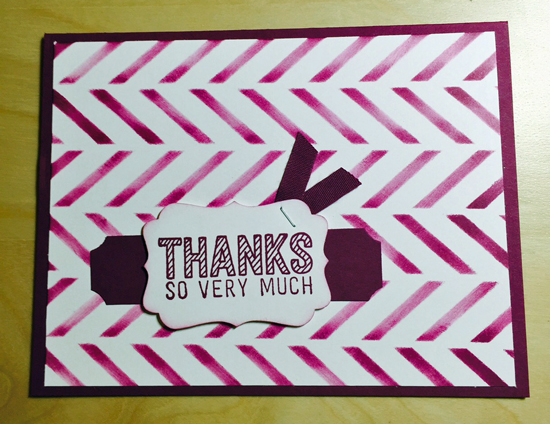
So far I have about 60 cards done, so I’m on my way. You can see one in progress above. Some are simple, some are much more complex; I enjoy doing both types. I sell Stampin’ Up products, so that’s what I use most of the time, but if I see an idea that I love, I go for it regardless of the products used.

For instance, this stamp set from Lawn Fawn was just delivered, and I can’t even!

alpaca-my-scarf

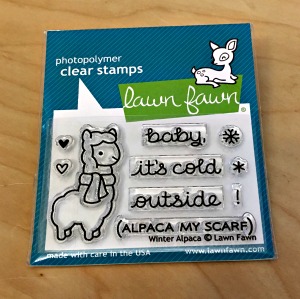
Alpaca my scarf—I love it when crafting interests collide!

What’s on My Needles?

Still that Lori shawl, but it’s almost done. My gauge is much better with the Addis, so there’s a lesson in there, somewhere. I also blocked a project that I finished last year, 198 Yards of Heaven, a little knit shawl pattern:

red-shawl-finished

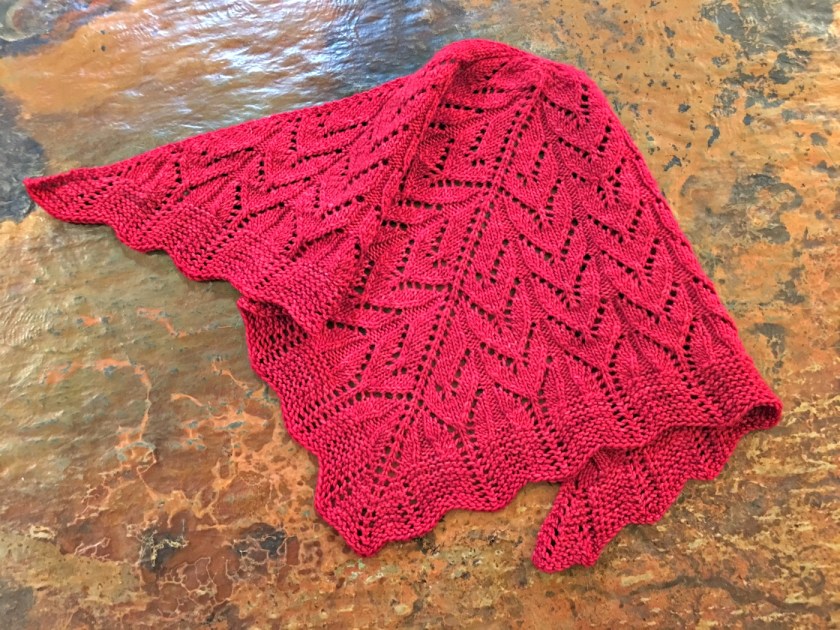
I LOVE IT! I finished it in four days at a knitting retreat, and then I put it in a drawer and forgot about it for a year. Sigh. But it resurfaced and I blocked it last week. I’ve worn it twice and my mom has worn it three times. 🙂

I used Malabrigo Worsted for the body and some of the border, and then I ran out of yarn, so I finished with Malabrigo Twist in the same color, and you can’t tell the difference. If I’d have stuck to the pattern, the 210 yards of Worsted would have been fine, but I just had to go and add a repeat (I wanted it to be bigger), so I needed more yarn.

2kathdavenport2016I thought I had another ball of Worsted, but no. And there was no more of that color at the yarn shop, so I was resigned to ripping out the extra repeat, but the gal at the shop suggested Twist to finish it off, and the colors were identical. When does that happen?? Love the LYS staff so much.

I highly recommend this pattern. 198 Yards of Heaven is by Christy Verity, and it’s fun, easy, and QUICK. Lace with Aran-weight yarn? Sign me up.

The photo at left is me wearing my shawl on a night out in Spokane. Mimi and I met friends at the historic and gorgeous Davenport Hotel, and attended Christmas Tree Elegance. This is an annual fundraiser for the symphony, and companies and individuals donate several themed trees and raffle them off. There was an over-the-top Seahawks tree, and I had to stop Mimi from putting all of our tickets in that bucket! Here’s a glimpse:

seahawks-tree

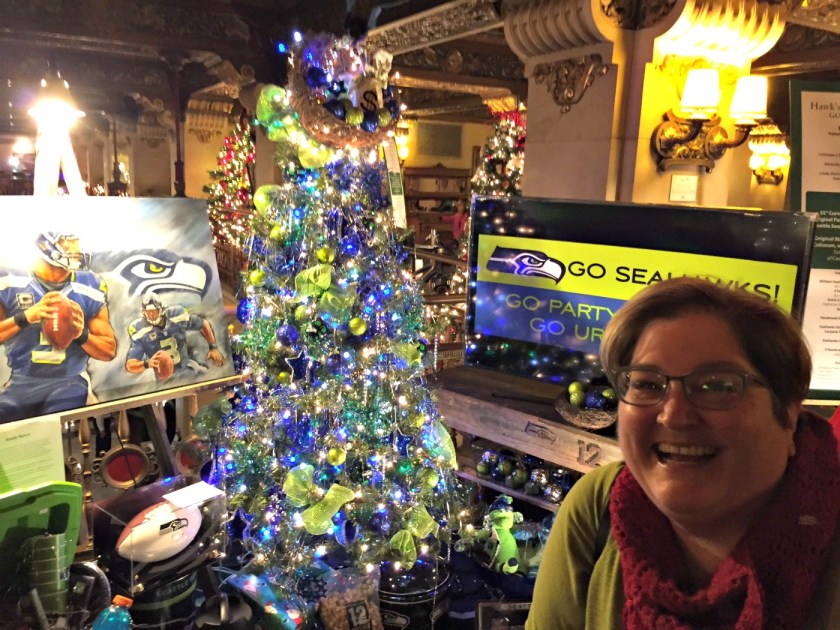
The winner gets all of that stuff! Including the giant TV. My favorite tree was called Gnome Sweet Gnome, which included a lot of gnomes, naturally, and patio furniture and decorations. Pretty cute. We love that event; it’s so festive and a great kick-off to the holiday season.

So there’s a wrap up of my bi-craftual activities and holiday happenings. Are you bi-craftual? Tell me about your interests!

Cheers,

1KCsig


Advertisement
Posted in Stampin' Up

Stitched With Cheer

The photos in the 2016 Holiday Catalog don’t do this one justice! I had the chance to make one of the cards in the Stitched with Cheer kit, and it’s SO CUTE!

The sewing part was really easy and fast, too. Check it out:

starcard-600

The kit comes with envelopes, too, with coordinating liners attached. This is a really good deal—you get 18 cards with envelopes, 6 each of three designs.

To complete this kit, you’ll need the Stitched with Cheer stamp set. It’s super versatile; you can use it on all of your Christmas projects! Round out the supplies with the Emerald Envy Classic Stampin’ Pad and Basic Black Archival Stampin’ Pad. You’ll also want adhesivedimensionals, and the rest of your regular crafting supplies.

Get your Christmas cards done in a weekend with the Stitched with Cheer kit!

Happy stamping,

1KCsig


Posted in Stampin' Up

Hummingbird Beauty

This might be my favorite card I’ve created. Ever. I just love it!

I used the Picture Perfect stamp set, which is a multi-step set. This means you use several stamps and colors to create a very detailed and beautiful stamp. Usually the stamps are stamped from lightest to darkest, which is what I did here.

Picture Perfect - Stampin' Up
A Beautiful Hummingbird Card

I had to use my Misti stamping tool to get this lined up perfectly, because my eyes are old and I had trouble doing it cleanly by hand. The Misti is my friend, and I LOVE HER! The tool lets you perfectly place cling stamps so they end up exactly where you want them. Awesome.

Now on to the how-to of this card. On a Whisper White layer,  I used Pool Party, Lost Lagoon, and Night of Navy for the bird, and Blushing Bride, Calypso Coral, and Real Red for the Roses. The leaves are Garden Green and Mossy Meadow.

So, to make this beauty I stamped the first hummingbird stamp (they’re marked 1 -4) in Pool Party. The second stamp is the bird’s neck, and I skipped that one. For stamp 3, I used Lost Lagoon. Stamp 4 was Night of Navy. Then I went in with a Real Red marker and colored the bird’s neck a bit.

For the roses, I stamped the first layer in Blushing Bride, the second in Calypso Coral, and the third in Real Red. I really love this color combo!

The leaves are Garden Green first, and Mossy Meadow second. The sentiment is from the same stamp set, stamped in Basic Gray. I think it’s so sweet.

All of the materials are available in my online store. I hope you’ll try this card. It’s a real winner.

Happy stamping,

1KCsig


Save

Posted in Stampin' Up

Hello, Chickie!

Your So Sweet - Stampin' Up - Honeycomb Happiness
Chickie Thank You Card

I’ve had so much fun with the super cute Honeycomb Happiness stamp set from the Sale-A-Bration 2016 catalog.

For this card, I used a Lost Lagoon card base and a Shimmery White card layer. I used Aqua Painters to watercolor with Daffodil Delight, Watermelon Wonder, and Lost Lagoon reinkers mixed with water. I completely dried the background with my heat gun.

To get the droplet marks on the watercolor, I used a Stampin’ Mist sprayer and sprayed the surface once. They I used the Aqua Painter to drop little water droplets on the painted surface. After about 30 seconds, I blotted the surface with a paper towel. Stampin’ Up ink is reactive to water, so the water droplets and spray picked up some of the color, adding more detail to the background.

I stamped the little chickie in Tuxedo Black Memento ink. I colored the chick with Copic markers to get a shaded look, and cut it out. (I really wish Stampin’ Up would produce more coordinating dies!) I used the Fine Tip Glue Pen to attach it to the watercolor background.

I stamped the sentiment “You’re so Sweet” (from the Honeycomb Happiness set) with Lost Lagoon ink, and attached the watercolor layer to the card base with Fast Fuse adhesive.

The finishing touch is a Honeycomb Embellishment from the 2016 Occasions Catalog. So darling!

This was a really fun project!

All of the supplies are available in my online store!

Happy stamping,

1KCsig


Posted in Stampin' Up

Apothecary Arts Birthday Card

1Apothecary-fold-out

This card uses the retired Stampin’ Up favorites, Apothecary Art and the Labels Framelits.

The card is a fold out, make from an 11 X 4.5″ piece of paper scored at 5.5″, and then the left 5.5″ inch section is scored again at 2.25″ and folded outward, accordion-style.

The base card is Pool Party, with Sweet Sorbet designer paper.

Apothecary-fold-out

I cut two of the medium labels out of Whisper White. I adhered the one on one the fold first, and then placed the one on the inside so that it was directly under the one on on the front of the fold. I used a blender pen to color the image, using Pool Party, Crisp Cantaloupe, and Old Olive inks.

The black grosgrain ribbon is from my stash.

I love this card! I hope you’ll try this type of folded card—it’s fun to make!

Happy stamping,

1KCsig

Posted in Stampin' Up

Stencil Thank-You Card

This one was for a card exchange, and the theme was stencils. I used Blackberry Bliss on Whisper White, and the Thanks stamp from the Stampin’ Up Simply Wonderful stamp set.Stencil_Thanks

The stencil is Hero Arts Chevron Stencil Pair. I used a sponge to make the stencil. I punched the Thanks sentiment out with the Decorative Label Punch, and put a banner behind, with ticket-punched corners. I used a We ‘R Memory Keepers corner chomper for the ticket corners. I sponged around the edge of the sentiment and attached a little ribbon with a small staple.

To make it easier to write in, I added a Whisper White layer to the inside of the card.

Posted in Stampin' Up

Butterfly Basics Mother’s Day Card

Mother's Day card uses Stampin' Up Butterfly Basics stamps and dies. Main color is Rich Razzleberry. 5 X 7 card.

My Mother’s Day this year card uses Stampin’ Up Butterfly Basics stamps and dies. The main color is Stampin’ Up Rich Razzleberry, on a  5 X 7 card base.

I CASEd (CASE = Copy and Share Everything) this card from Terry at classycutupscreations.com. I saw it on Pinterest, and fell in love with her beautiful design.

I made it mine by running the card base through the Big Shot with a trellis embossing folder and distressing the embossed portion with a Tim Holtz Walnut Stain Distress ink pad. I used a Stampin’ Up Very Vanilla base layer, which I distressed with an edge distressing tool, and then edged with the Walnut Stain ink pad. I added the chicken wire stamp and corner flourish stamp from BoBunny Distressed Textures stamp set, and a border cut with a Martha Steward border punch.

After I cut out the butterfly, i used the outline of the cut as a stencil to sponge a little Rich Razzleberry so it would show underneath the butterfly. The chicken wire stamps were stamped with Stampin’ Up Chocolate Chip ink.

My Mom loved it, and I hope you will, too.

The Stampin’ Up materials are available in my online store.

Happy stamping!

1KCsig